Posts tonen met het label scraps. Alle posts tonen

zondag 1 mei 2016

One border added - Eén boord toegevoegd

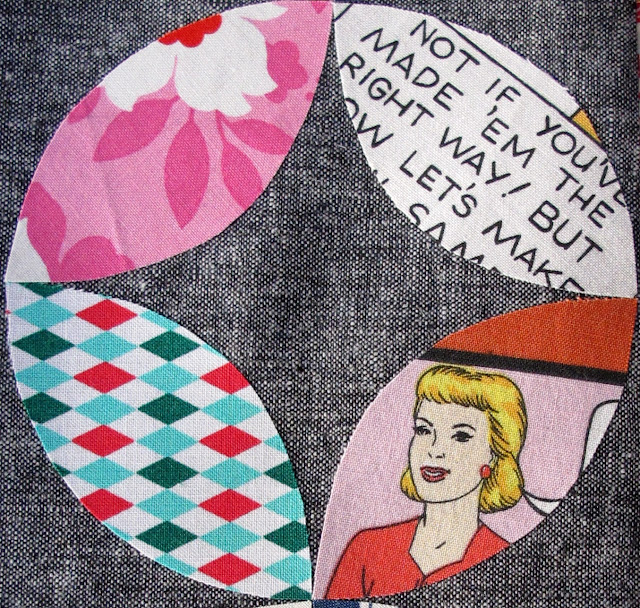
All the orange peels are finished and the four borders added to bee quilt. I'm quite happy with the result.

Alle blaadjes zijn afgewerkt en de vier boorden aan de quilt gestikt. Ik ben best tevreden met het resultaat.


As always, I did not really have a plan before adding the orange peels. No plan means no measurements. This resulted in not being able to  continue the orange peels around the corners, because to do that, I should have made a plan before sewing and as always, that was too much to ask.  I solved this by adding a flower in avery corner, using leftover flowers and leaves from my HST quilt. It is a scrap quilt after all.

Zoals gewoonlijk had ik geen plan gemaakt alvorens de blaadjes aan de quilt te naaien. Geen plan en dus geen afmetingen. Daardoor kon ik het patroon van de blaadjes niet laten laten doorlopen in de hoeken. Daarvoor had ik eerst moeten nadenken en dan naaien, maar dat bleek weeral eens te veel gevraagd. Ik loste het probleem op door in elke hoek een bloem te naaien,  waarvoor ik overschotjes gebruikte van mijn HST quilt. Het is en blijft immers een restjesquilt.


The quilt measures 130cm x 170 cm now, so I want to add a a second border. How that will look, is still a mystery to me. Ideas are welcome :-)

De quilt meet nu 130cm x 170cm, dus ik wil graag nog een tweede boord toevoegen. Hoe die eruit zal zien is ook voor mij nog een raadsel. Alle ideeën zijn welkom :-)

zondag 10 april 2016

Working on my bee quilt - Werken aan mijn bee quilt

Remember this quilt?

Herinner je je deze quilt nog?


This quilt is the result of my participation in a quiltbee (you can read my previous posts on it by clicking on the tag "quiltbee"), but I haven't worked on it since 2014. I wanted to add borders, and decided to add a first border made of an orange peel pattern. I planned to appliqué all the orange peels on the border, but after spending some frustrating hours on six peels with equally frustrating results I adopted a different technique: I used Vliesofix to iron the peels on the fabric.

Deze quilt is het resultaat van mijn deelname aan een quiltbee (je kan de vorige posts lezen door te klikken op de tag "quiltbee"), maar ik heb er sinds 2014 niet meer aan gewerkt. Ik wou randen toevoegen, en besliste een eerste boord te maken met een patroon van blaadjes. Eerst zou ik alle blaadjes met de hand naaien op de achtergrondstof, maar na enkele frustrerende uren aan zes blaadjes besteed te hebben, met een even frustrerend resultaat, veranderde ik het geweer van schouder: ik gebruikte Vliesofix om de blaadjes op de stof te strijken.

Here you see the difference between the appliqué peels (lower row) and the Vliesofix ones (upper row).

Hier zie je het verschil tussen de opgenaaide blaadjes (onderste rij) en de Vliesofix blaadjes (bovenste rij). 

After ironing them on, I sewed all around them to be sure they won't come loose. This is how it looked before sewing around...

Nadat de blaadjes gestreken werden, stikte ik er voor alle zekerheid nog eens helemaal rond. Zo zag het eruit voor ik er rond stikte...

And this how it looks now.
En zo ziet het er nu uit.


And this is how the quilt looks now, with one side of the first border added.

En dit is de quilt in zijn huidige versie, met één zijde van de eerste boord erbij.

Many more orange peels to make, so I'll focus on this project the next weeks.

Er zijn nog veel blaadjes te maken, dus dit project zal me zeker de volgende weken bezighouden.

donderdag 23 mei 2013

A finished scrappy quilt - een afgewerkte restjesquilt

One of my New Years resolutions for 2013 was turning some of the quilttops that were lying around on my attic, into real, finished quilts. I made a mosaic of 4 quilttops that in my eyes really deserved to be finished.

Eén van mijn goede voornemens voor dit jaar, was het afwerken van enkele quilttops die al even op mijn naaizolder rondslingeren. Ik maakte een mozaïekje met 4 quilttops die het echt wel verdienden afgewerkt te worden.

I managed to finish the first of these in January (the upper left one), to the delight of my daughter who now has a warm winter quilt. I have to confess that she often has to share it with me when I'm watching tv.

In januari slaagde ik erin één van deze quilts af te werken (die links boven), tot vreugde van de dochter, die nu een warme winterquilt heeft. Ik moet hier eerlijk aan toevoegen dat ik hem even vaak gebruik wanneer ik tv kijk.

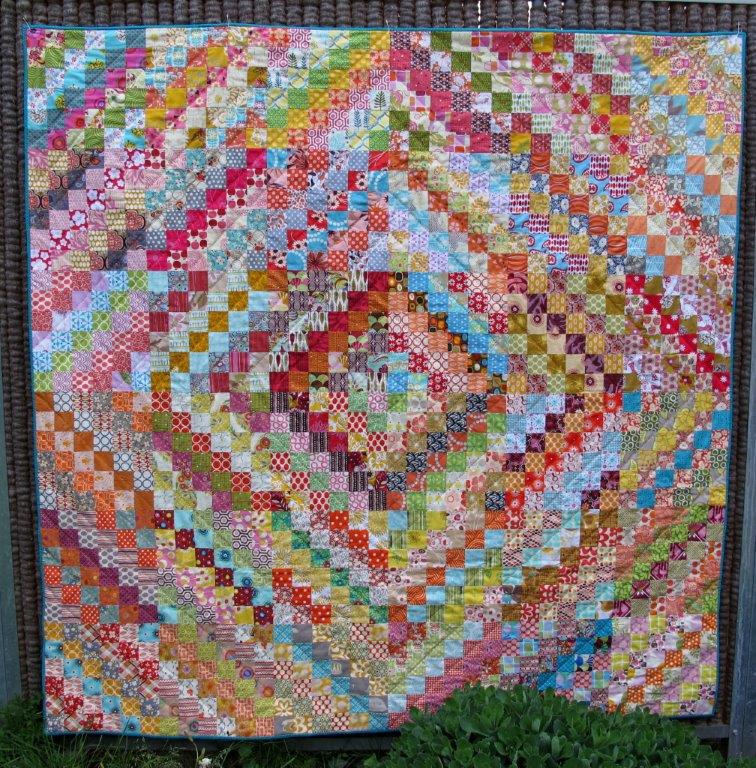
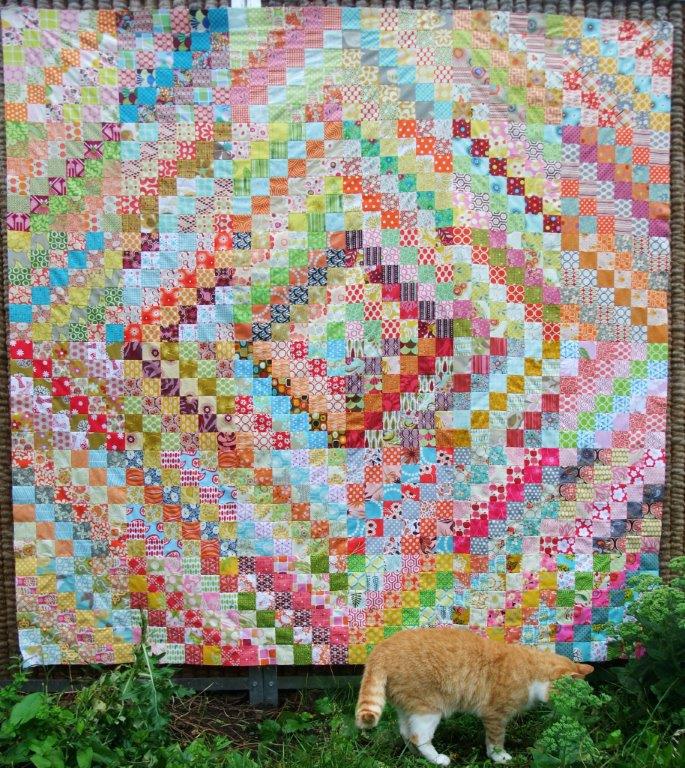
In February, I started the mental preparation necessary to bring me in the right state of mind to be able to finish a second quilt. This scrappy quilt has been lying around since 2011. Its pretty big (71" x 71") and I was not really looking forward to machine quilting this thing. Sure it's faster, but what a struggle to get all this fabric through the machine. I find it actually a lot easier to hand quilt it.

In februari begon ik aan de mentale voorbereiding voor het afwerken van de tweede quilt. De restjesquilt ligt hier al te liggen sinds 2011. Hij is behoorlijk groot (180cm x 180cm) en ik zag er eigenlijk wel tegenop om die onder de machine te quilten. Tuurlijk gaat dat sneller, maar wat een gedoe om zo'n groot ding onder die naald te trekken en te sleuren, met als resultaat vaak scheve stiklijnen. Veel eenvoudiger eigenlijk om alles met de hand te quilten.
A finish!
So that's exactly what I did. I used perle cotton (again) in orange (again). The fact that I completely miscalculated the amount of perle cotton I would need to quilt my single girl quilt 2 years ago, means that orange will have to stay my favourite colour for some time to come.

En zo geschiedde. Voor de zoveelste keer gebruikte ik mijn geliefde coton perlé en voor de zoveelste keer in het oranje. Het feit dat ik me twee jaar geleden zwaar vergiste in het aantal perlé bolletjes dat ik nodig zou hebben voor mijn single girl quilt betekent dat oranje garen hier nog enkele jaren favoriet zal blijven.
A finish!

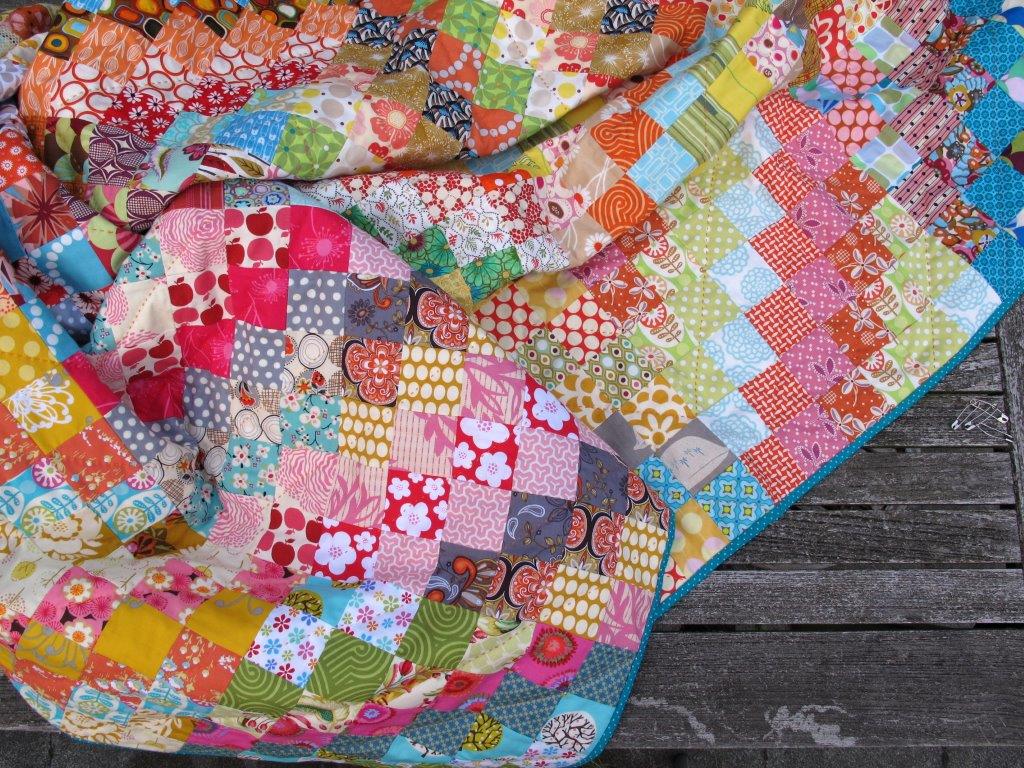
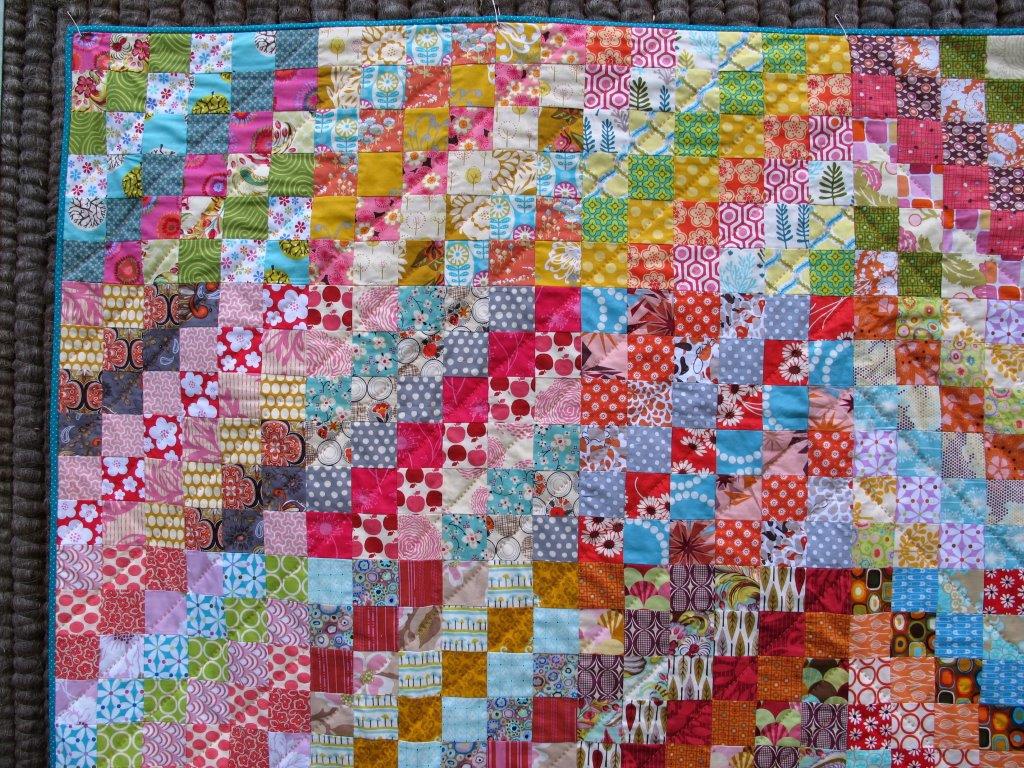
The quilting was kept really simple. I followed the pattern of the quilt and quilted through every second line. The Free Spirit fabric for the back was a bargain at 6 euro/metre.

Het quilten bleef eenvoudig. Ik volgde het ruitpatroon van de tekening en liet telkens één rij tussen. Op de achterkant geeft dat een leuk effect. De stof voor de achterkant, een Free spirit stofje, kon ik voor 6 euro/m op de kop tikken.
A finish!

A finish!
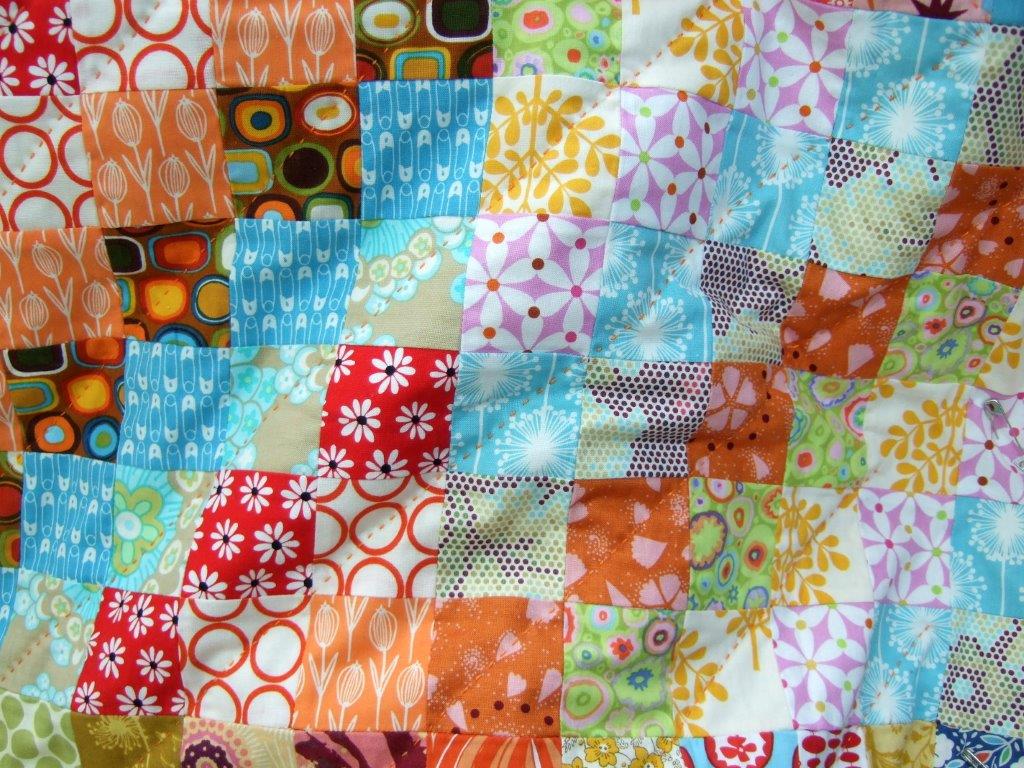
The colours of this quilt are pretty insane. But that's the great thing about it: you can just throw all your scraps together and the result will still be a fun looking quilt.
De kleuren van deze quilt zijn echt wel behoorlijk heftig. Het leuke eraan is dat je werkelijk alle je restjes samen kan klutsen en het resultaat blijft leuk.
A finish!


Speaking of Flickr: I'm very dissapointed in their new version, especially because they now completely neglect the community aspect of the site. Shame on you, Flickr.

Over Flickr gesproken: ik ben zwaar teleurgesteld over hun "opgeleukte" nieuwe versie, vooral omdat het sociale aspect van de site nu compleet wordt verwaarloosd. Foei, Flickr.

zondag 14 april 2013

Perle cotton - Coton perlé

Spring has finally arrived here, and for the first time in months we're enjoying fine weather. So I changed my original plans for the weekend and instead of spending time on my attic behind my sewing machine making my bee block for this month, I worked in my garden. Sometimes you have to adapt your priorities to the circumstances.

De lente is eindelijk in het land en voor de eerste keer in maanden voldoet het weer aan de verwachtingen. Oorspronkelijk was ik van plan dit weekend enkele uren op mijn zolderkamer achter de stikmachine door te brengen om mijn bee-verplichtingen van deze maand na te komen, maar in plaats daarvan werkte ik in de tuin. Soms moet je je prioriteiten aanpassen aan de omstandigheden.
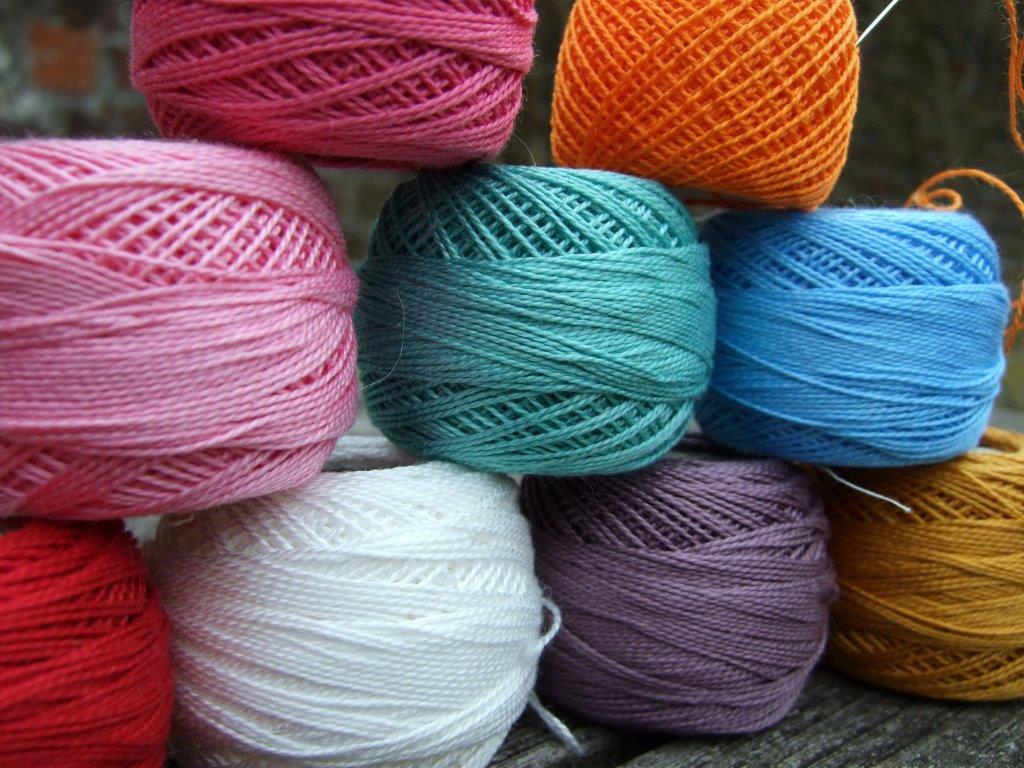
I did do some sewing this week though, as I'm quilting the trip around the world scrappy quilt. As so often before, I'm using perle cotton again. I love to quilt with perle cotton, it's a lot of work, but it adds a nice softness and a modern look to the quilt. 

Toch naaide ik wat deze week, want ik quilt momenteel de trip around the world scrappy quilt. Zoals zo vaak gebruik ik ook nu coton perlé. Ik ben dol op coton perlé, het is behoorlijk wat werk om ermee te quilten, maar je quilt wordt er heerlijk zacht van en het oogt ook modern. 
Quilting with perle cotton

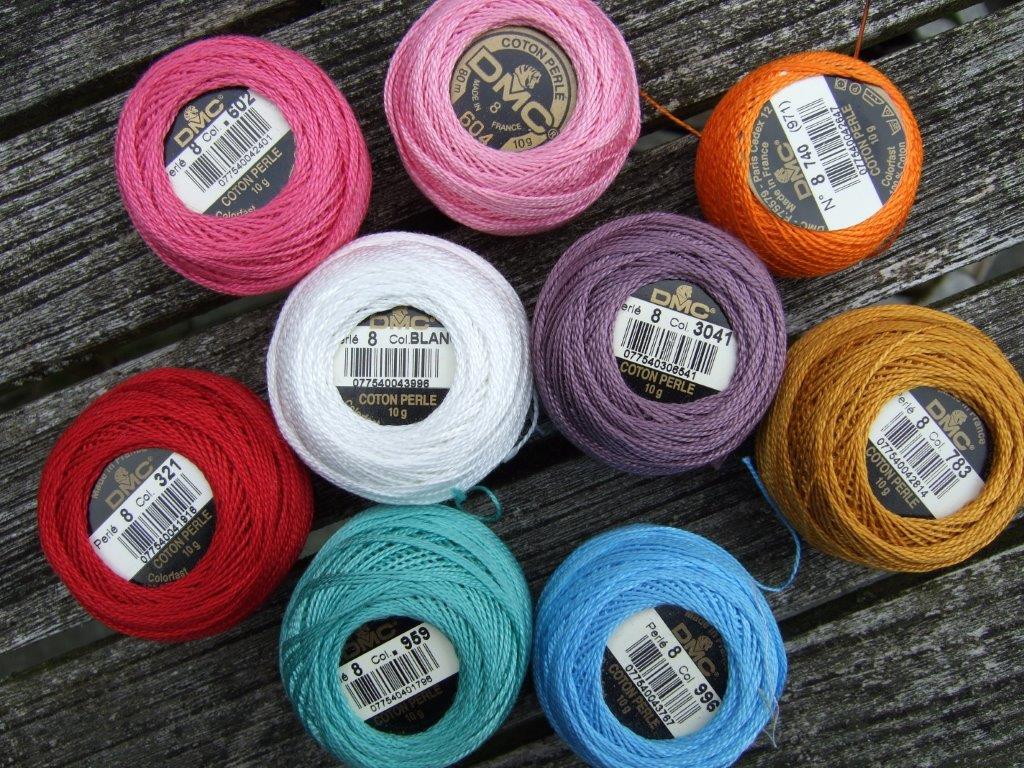
I always use DMC perle cotton n° 8, readily available in many colours in shops all over Belgium. I buy mine mostly at my local crafting shop 't Wolwinkeltje, but I'm sure you can find them online too, at DMC's website for instance.

Ik gebruik altijd DMC coton perlé nr. 8, bolletjes die je overal in België in vele kleuren vindt. De mijne komen vooral van een lokale winkel, 't Wolwinkeltje, maar ik ben er zeker van dat je ze ook makkelijk online vindt, op de website van DMC bijvoorbeeld.
Quilting with perle cotton
Quilting with perle cottonAnd now back to my garden, for some more weeding and pruning. And enjoying the sun of course, in the company of an icecream!

En nu terug naar de tuin, om wat meer te wieden en snoeien. En genieten van de zon natuurlijk, in gezelschap van een ijsje!


woensdag 6 februari 2013

Wiener Werkstätte

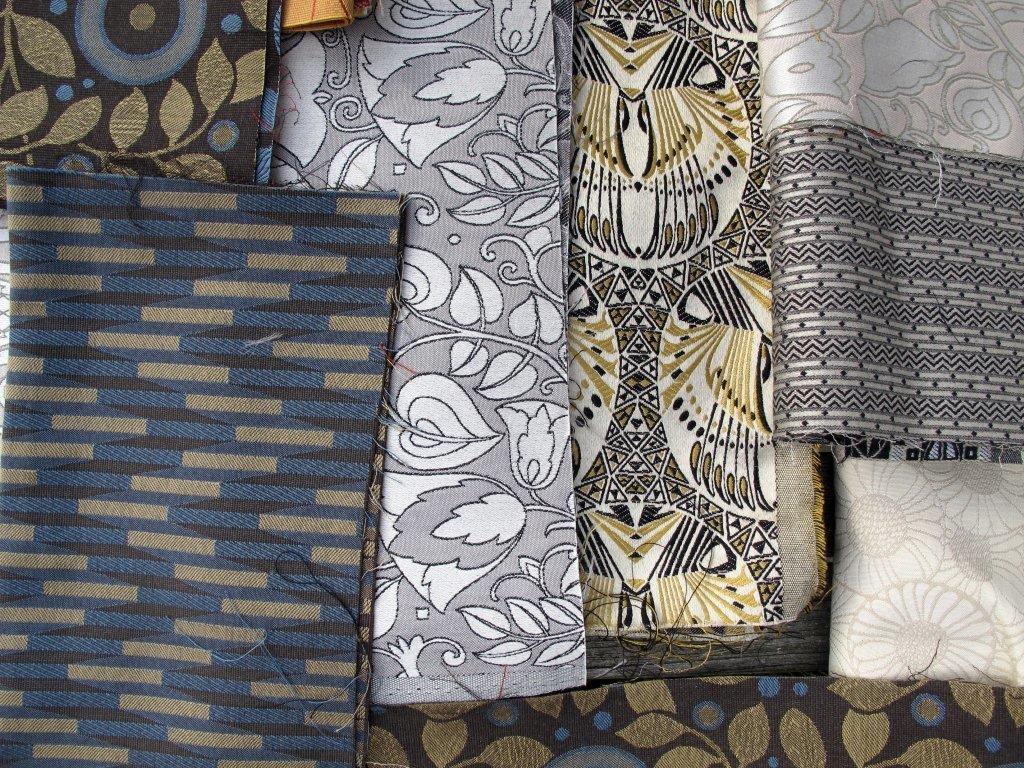
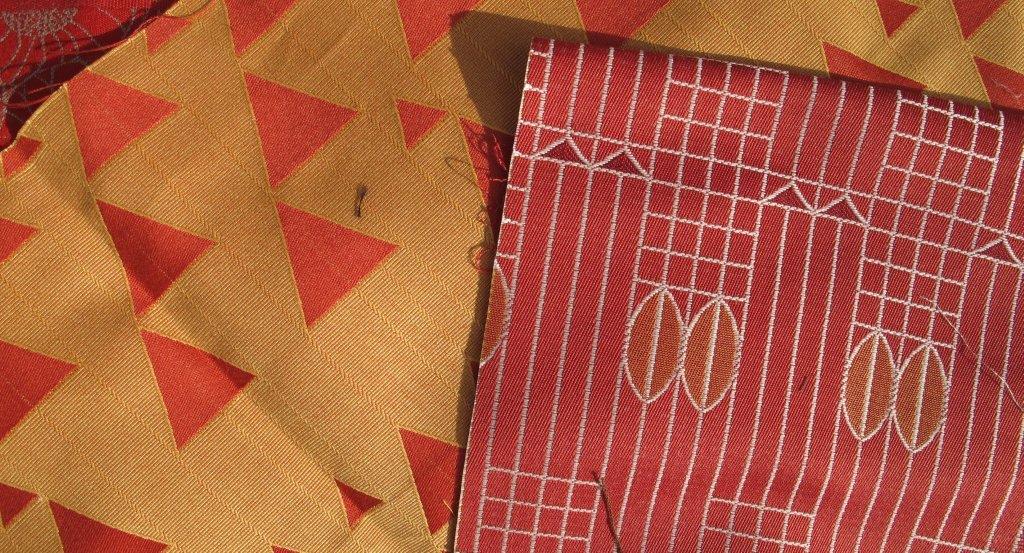
Last weekend, I received the most beautiful fabrics from my sister in law. They're reproduction Wiener Werkstätte fabrics and are just gorgeous. 

Afgelopen weekend kreeg ik de meest prachtige stoffen van mijn schoonzus. Het zijn reproductie Wiener Werkstätte stoffen en ze zijn gewoonweg prachtig.
IMG_0851bis klein
They are all scraps, some are bigger pieces, others very long and narrow, but I'm sure I'll find a good use for even the smallest piece.

Het zijn allemaal restjes, soms grotere stukken, soms lange en smalle stukken, maar ik ben er zeker van dat zelfs de kleinste stukjes gebruikt zullen kunnen worden.
IMG_0853bis klein
IMG_0854bis kleinThey are a lot heavier than quilting fabrics, so I'll probably not use them in a quilt. Any suggestions on how to use them best?

Ze zijn veel zwaarder dan quiltstoffen, dus ik zal ze waarschijnlijk niet in een quilt gebruiken. Suggesties over hoe ze best gebruiken zijn altijd welkom!
IMG_0857bis klein

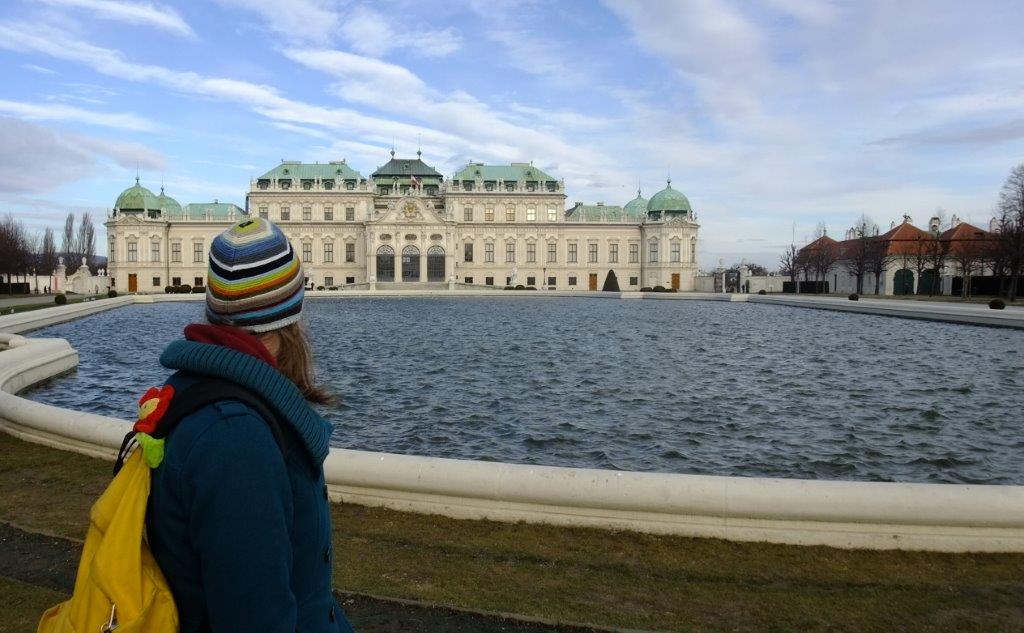
And last but not least: a picture of my daughter in front of the Belvedere Palace in Vienna last weekend where you can see amazing paintings by Gustav Klimt. I absolutely recommend it!

En om te eindigen: een foto van mijn dochter voor het Belvedere paleis in Wenen afgelopen weekend, waar je prachtige werken van Gustav Klimt kan bewonderen. Een echte aanrader.
DSCF0183bis klein

maandag 4 februari 2013

Het doel voor februari - The February goal

A new month, a new goal. This month I will again try to set myself a goal that I want I want to reach by the end of the month. I would by far prefer to start on a new project, but if I'm really honest I have to confess that some of my old projects are in need of some attention.

Een nieuwe maand, een nieuw doel. Ook deze maand probeer ik mezelf een doel voor ogen te stellen dat tegen het einde van de maand gehaald moet zijn. Eigenlijk zou ik veel liever aan weer nieuwe projecten beginnen, maar eerlijk gezegd hebben sommige oude projecten stilaan echt wel behoefte aan wat aandacht.

Since February is a short month, it's important to be realistic in what I choose. That's why I'll try to finish this quilt top:

Het is belangrijk realistisch te zijn in mijn betrachting, februari is een korte maand. Daarom kies ik ervoor deze quilttop af te werken:
DSCF8607 klein
It has been lying around for almost a year and a half now. I could finish it, but I decided to add two more rows so that the end result will be big enough for a queen bed. Two rows, that's 12 blocks. And then sew them all together. Shouldn't that be feasible?

Meer dan anderhalf jaar al ligt die er zo bij. Ik zou hem kunnen afwerken, maar ik heb beslist er twee rijen aan toe te voegen zodat hij groot genoeg wordt voor een tweepersoonsbed. Twee rijen, dat zijn 12 blokken. En dan nog alles aan mekaar naaien. Zou dat niet haalbaar zijn?

I'm linking to the Lovely Year of Finishes - February Goal setting party, hosted by Fiber of all Sorts and Sew Bittersweet Design. Plenty more February plans to look at there!

Ik link naar de Lovely Year of Finishes - February Goal setting party bij Fiber of all sorts en Sew Bittersweet Designs. Daar vind je nog veel andere plannen voor februari!

zondag 3 februari 2013

Verjaardagskadootjes - Birthday presents

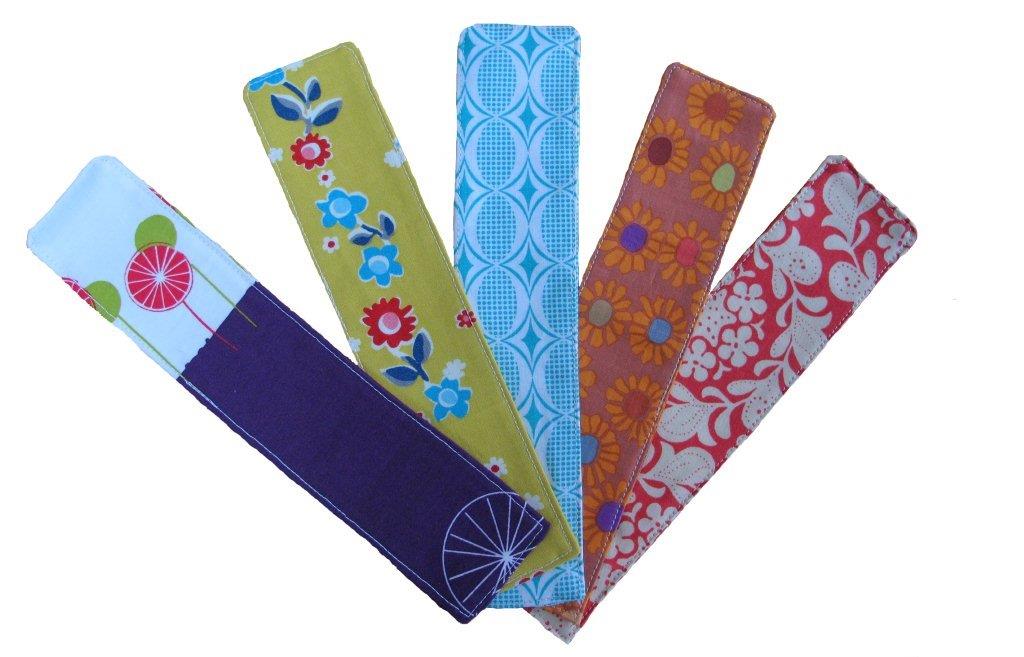
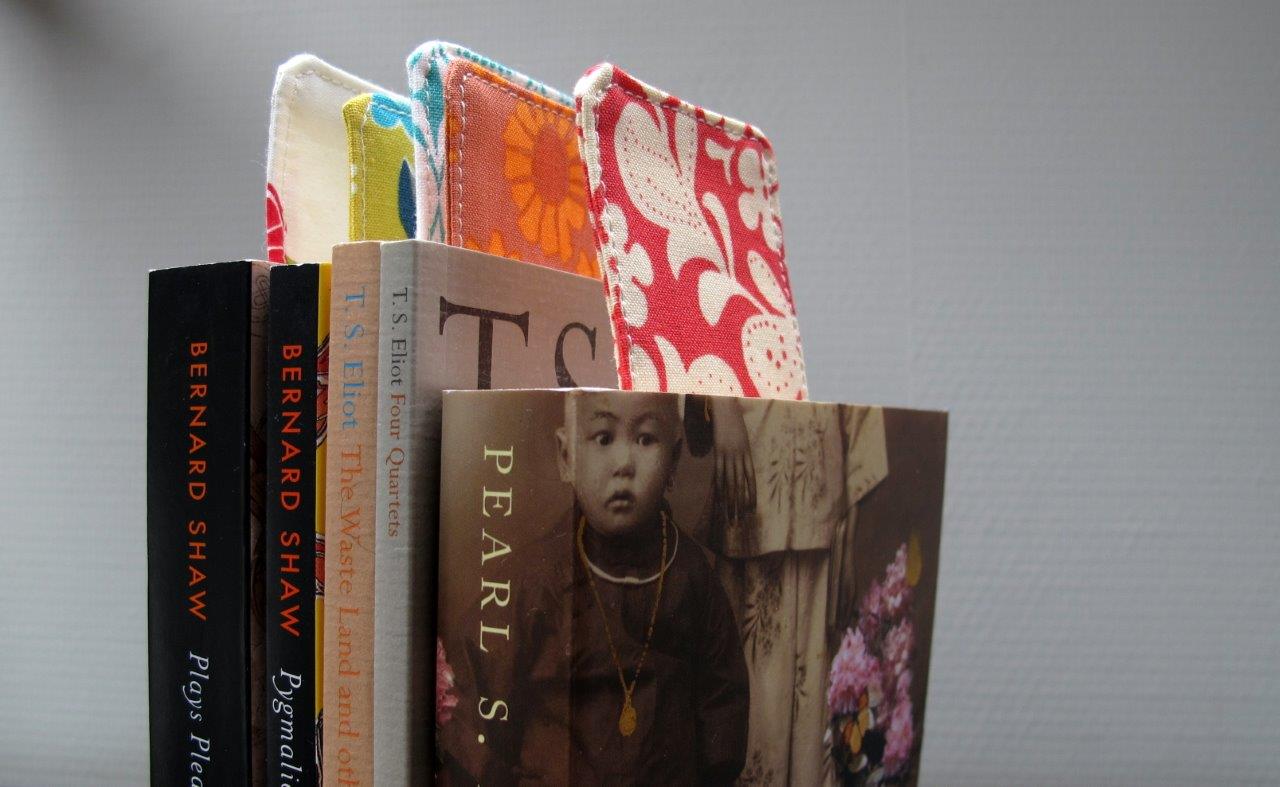
My sister in law celebrated her birthday and we were all invited. It was of course impossible to arrive empty-handed so presents needed to be found. As it turned out, my sister in law has a very special collection: a collection of books of every Nobel Prize winner for literature. En luckily for me, that collection isn't complete yet. During several lunch breaks, I went out and searched the bookshops in Brussels for some of the missing winners and found a few books. But these books needed a personal touch. And so I made a bookmark for every one of them. A fabric bookmark of course, because that's what I do.

Mijn schoonzus had een verjaardag te vieren en daarvoor waren we allemaal uitgenodigd. Natuurlijk kan je niet zomaar met lege handen aankomen, dus moest er voor kadootjes gezorgd worden. Nu blijkt mijn schoonzus een bijzondere verzameling aan te leggen: minstens één werk van elke Nobelprijswinnaar literatuur. En die verzameling is -gelukkig- nog niet compleet. Tijdens enkele middagpauzes ging ik in Brussel op zoek naar ontbrekende winnaars en vond snel enkele boeken. Maar het kado mocht wel wat persoonlijker, vond ik. En dus maakte ik voor elk boek een bladwijzer. In stof natuurlijk, want dat is nu eenmaal mijn ding.
IMG_0777tris klein
These are some of the books with matching bookmark. Literature affectionado's will have no problem spotting the Nobel Prize winners for 1925 (George Bernard Shaw), 1938 (Pearl Buck) and 1948 (T.S. Eliot). Not in the picture, but also bought were 1911 (Maurice Maeterlinck), 1927 (Henri Bergson) and 1937 (Roger Martin du Gard).

Hier zie je enkele boeken met bijpassende bladwijzers. Kenners herkennen ongetwijfeld onmiddellijk de Nobelprijswinnaars van 1925 (George Bernard Shaw), 1938 (Pearl Buck) en 1948 (T.S. Eliot). Niet op de foto, maar eveneens gekocht werden 1911 (Maurice Maeterlinck), 1927 (Henri Bergson) and 1937 (Roger Martin du Gard).
IMG_0773bis-1 klein
IMG_0774bis klein
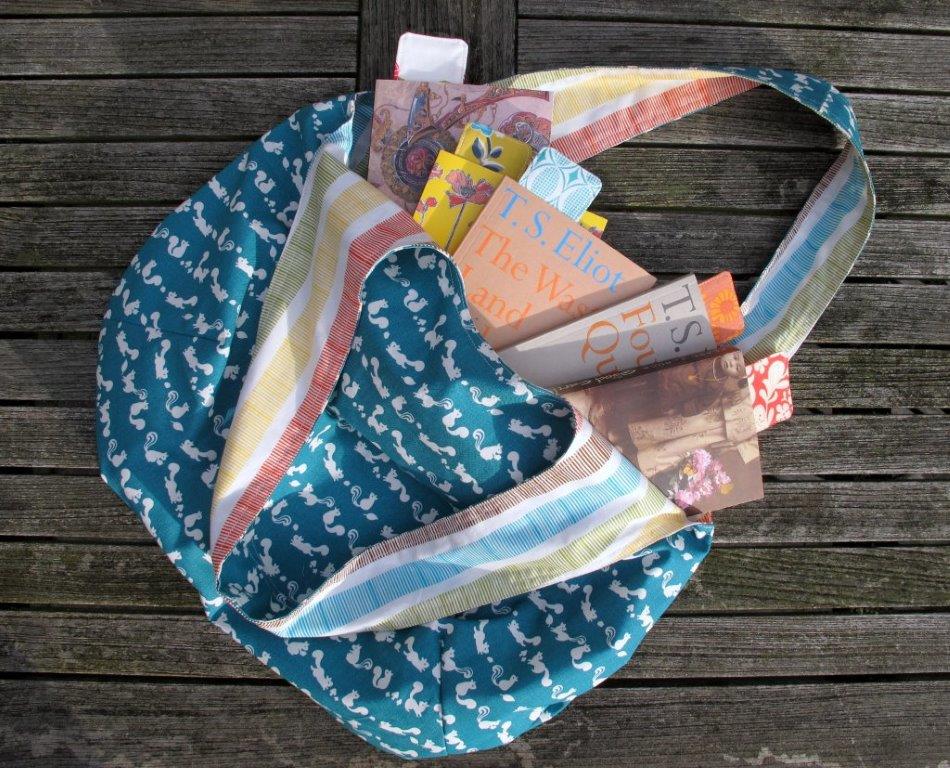
And this present wouldn't be complete without a bag to put all these books in. A pimped version of the "reversible bag" from Very Purple Person seemed like the ideal model (and the only one I feel comfortable making, ahem).

En wat ben je zonder tas om je aankopen in te versleuren als je je weer eens hebt laten gaan in de boekenwinkel? Een gepimpte versie van de "reversible bag" van Very Purple Person lijkt me daar het ideale model voor (en het enige dat ik eigenlijk kan maken, ahum).
IMG_0809bis klein
 Happy birthday and enjoy the reading!

Gelukkige verjaardag en veel leesplezier!

woensdag 23 januari 2013

Quiltbee

Two more letters from the quiltbee members! The "K" was made by Teresa and the "A" by Amy. I'm really pleased by how good they look all together.

De twee volgende letters van de quiltbee zijn aangekomen! De "K" werd gemaakt door Teresa en de "A" door Amy. Ik ben heel erg in m'n nopjes met het resultaat en de combinatie van de letters.
IMG_0738bis klein

woensdag 16 januari 2013

Quilt bee

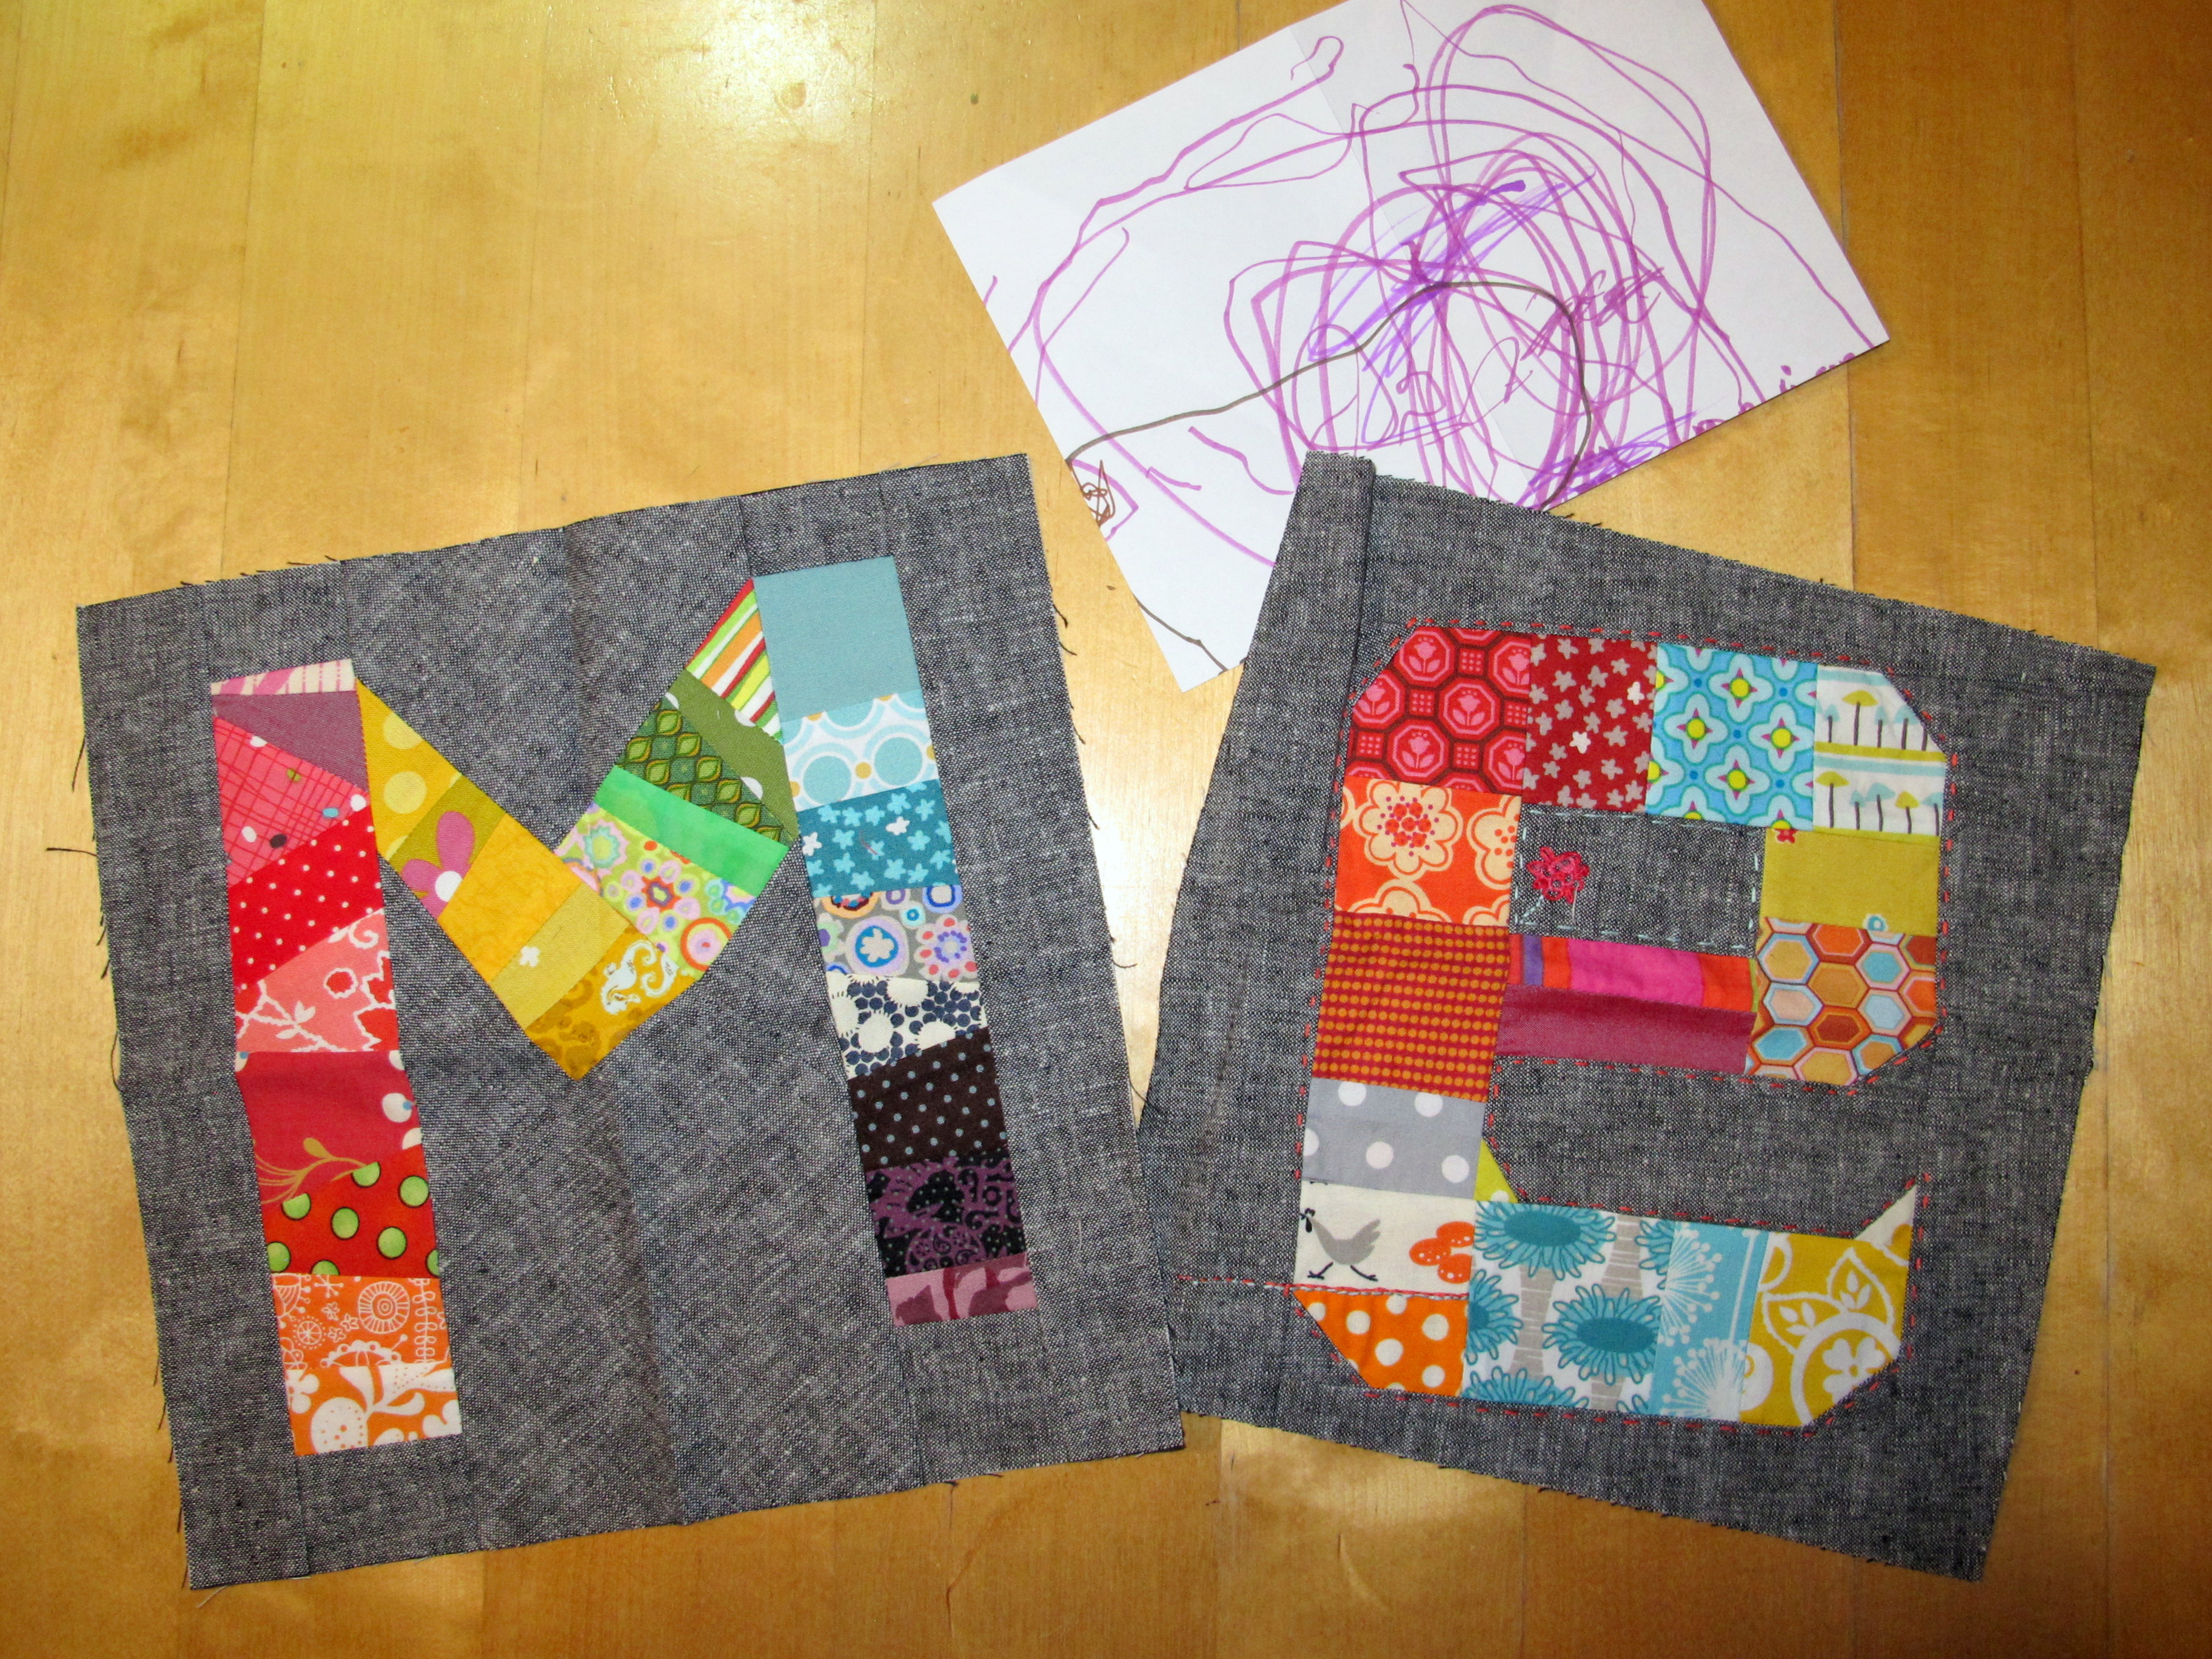
The first quilt blocks from my fellow bee-members arrived in my mailbox today. Such a nice surprise after coming home from work. I asked everyone to make a letter from colourful scraps on a dark background. Sue made an "M" and Ann an "E" and they are truly little masterpieces! And Ann even included an abstract art work by her 3-year old son, how sweet is that? You can see more letters, and of course many more other quiltblocks, in this Flick-group. On the downside, my train was so late today that I missed the patchworkclass and couldn't work on my Lone star quilt...

Vandaag kreeg ik mijn eerste quiltblokken teruggestuurd voor mijn maand. Een leuke verrassing bij thuiskomst van het werk.  Ik heb iedereen gevraagd een letter te maken van kleurrijke restjes op een donkere achtergrond. Sue en Ann maakten respectievelijk een M en een E en maakten er prachtstukjes van. En Ann stuurde zelfs een abstrakt kunstwerk op van haar driejarige zoon, hoe geweldig is dat wel niet? Meer letters, en natuurlijk veel andere quiltblokken, kan je zien in deze Flickr-groep. Het was wel balen dat de trein zoveel vertraging had dat ik mijn patchworkklas gemist heb en dus niet heb kunnen werken aan mijn ster van Betlehem...
IMG_0714bis
die achtergrondstof is zo moeilijk te fotograferen...


zondag 30 december 2012

Een letter maken met stof - Making a letter with fabric

January is my month in the bee and after looking around for the right block, I decided on a wordquilt.
Ofcourse I first had to try myself how to make a letter block. It turned out to be not very difficult, although the resulting block turned ou te be a bit bigger then intented. Too much enthusiasm, no doubt...
Januari is mijn maand in de quiltbee en ik heb na lang zoeken gekozen om een woordquilt te maken. Natuurlijk heb ik zelf eerst eens uitgeprobeerd hoe ik zo'n zelf zo'n letter zou kunnen maken. Het bleek niet zo heel moeilijk, alhoewel het resultaat wel wat groter uitgevallen is dan gepland. Blijkbaar was ik iets te enthousiast bezig...

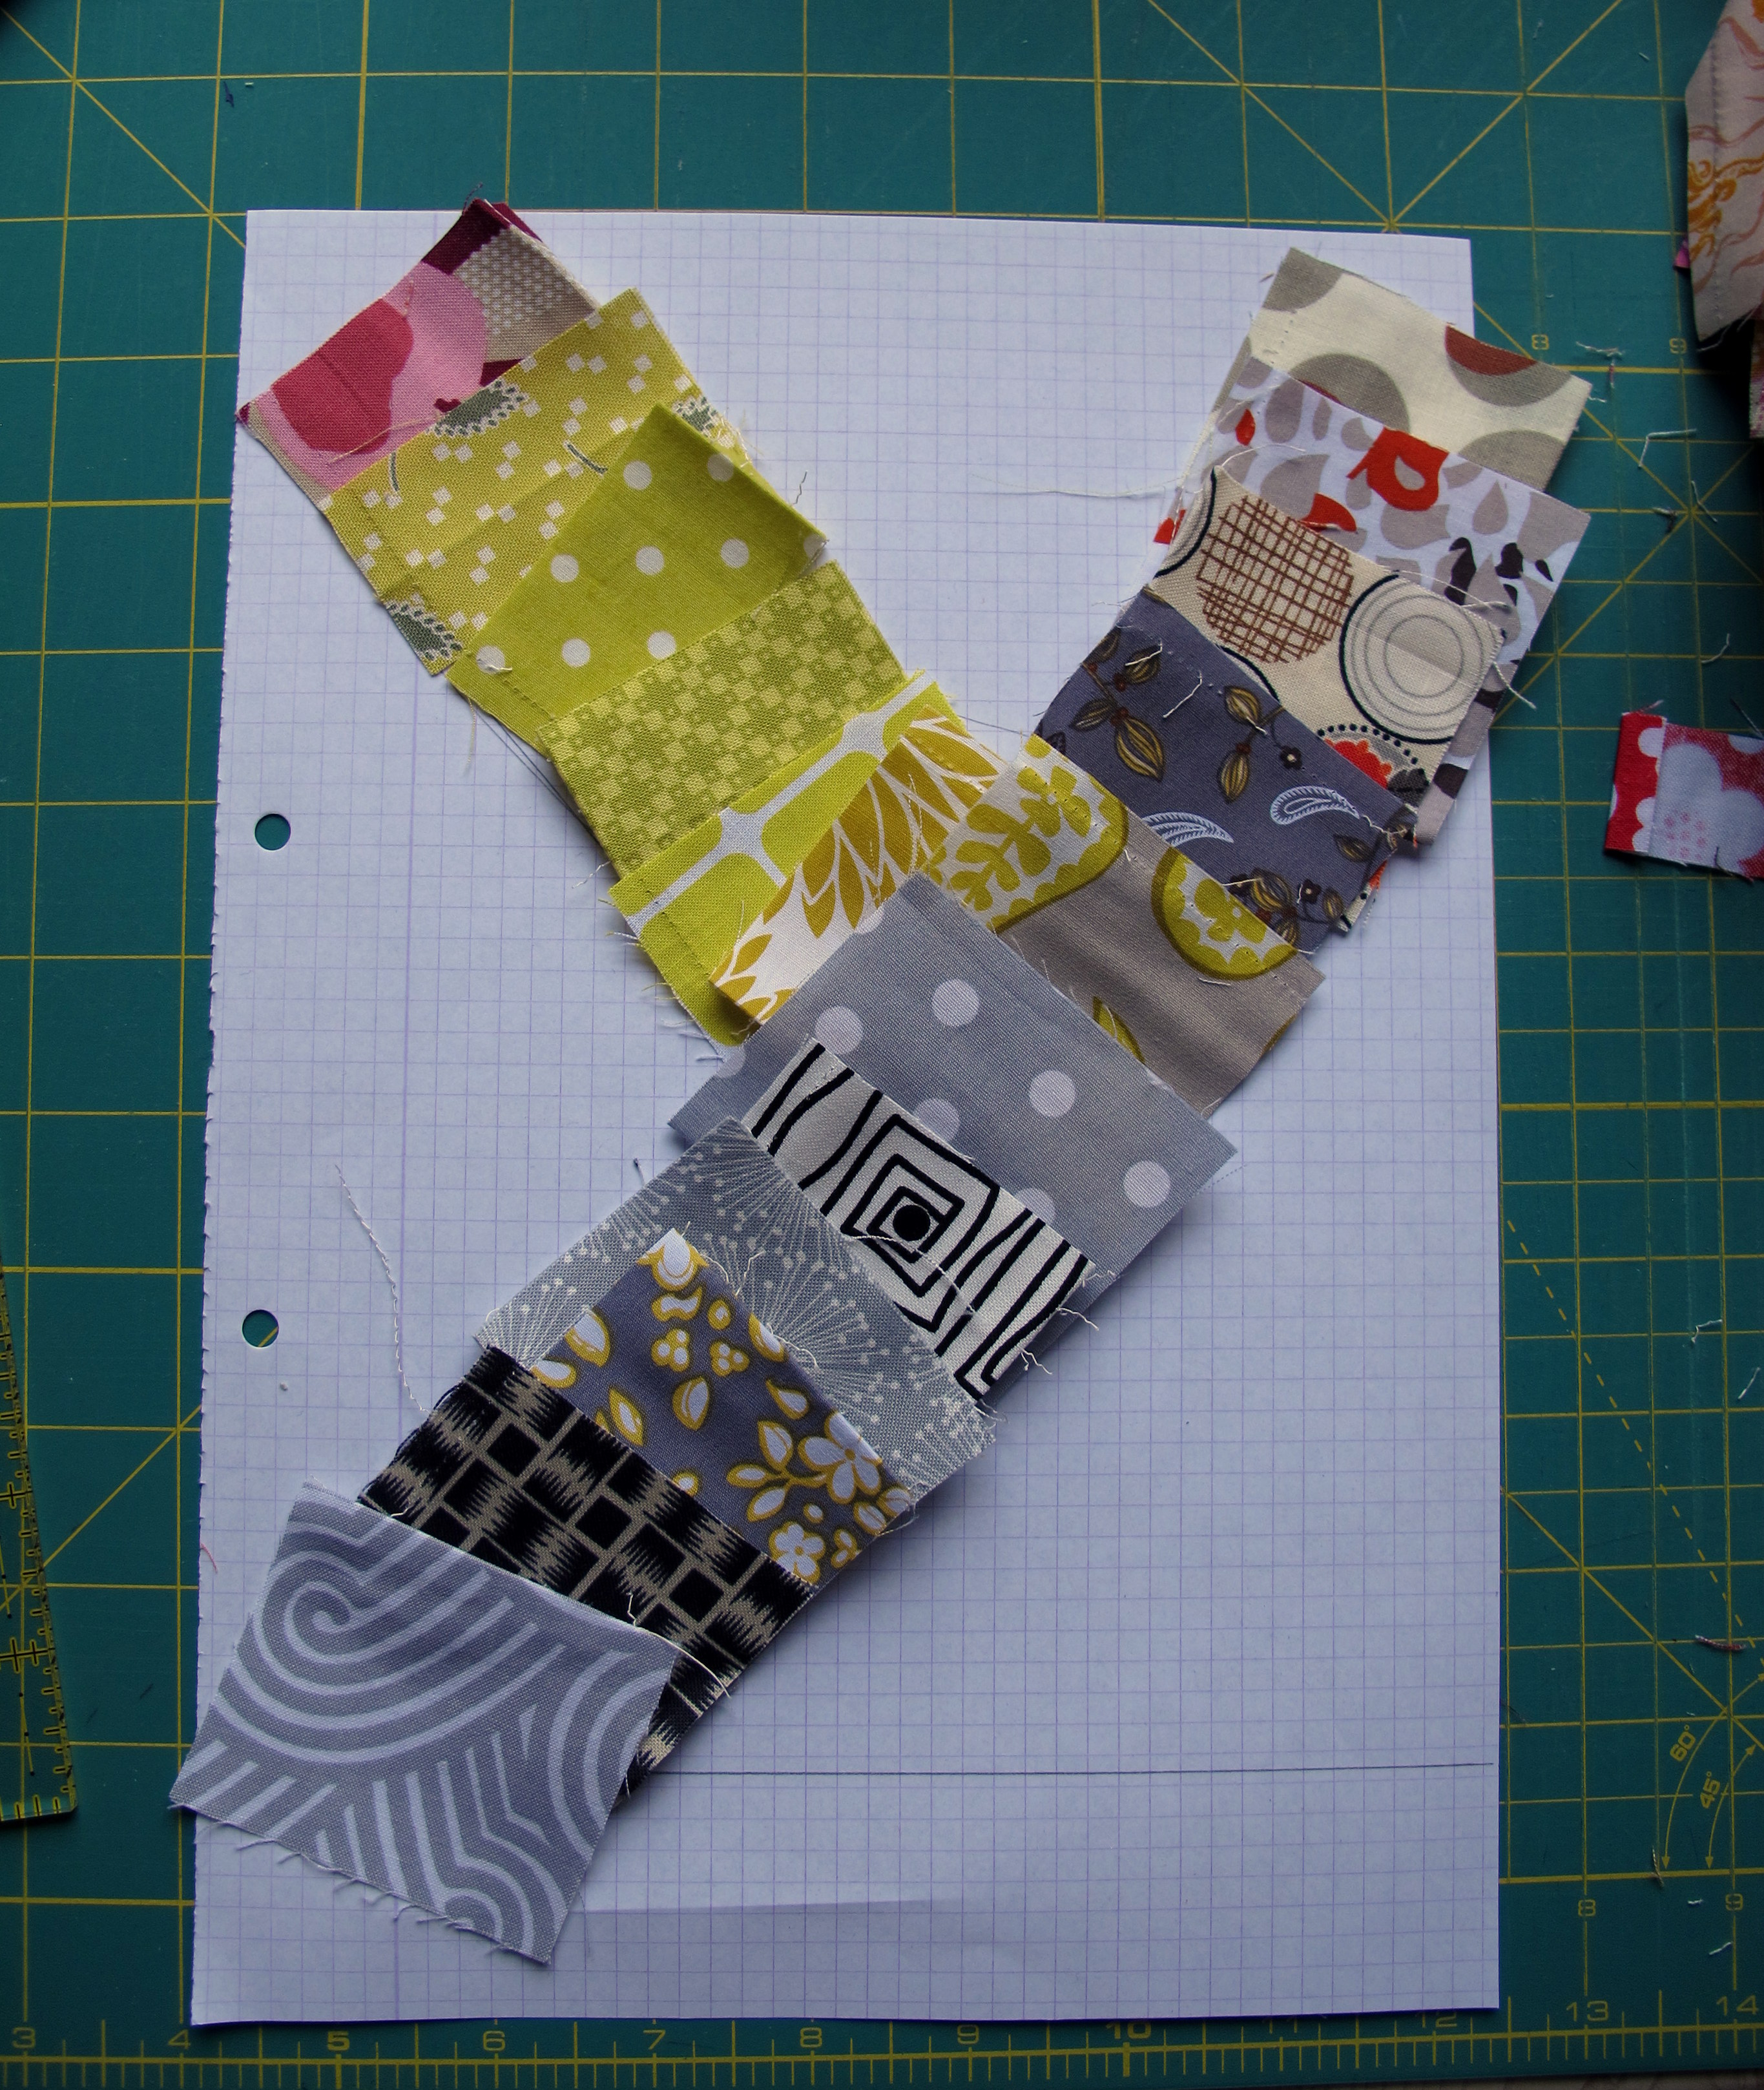
I first made a sketch of the letter I wanted to make on a piece of paper, and put scraps of fabric on the outline to have an idea where I was going and how much scraps I would need. That looked like this:

Eerst heb ik de letter op een stuk papier getekend, en daar vervolgens stukjes stof op gelegd om een idee te hebben van hoe het eruit zou zien en hoeveel stof ik nodig zou hebben. Dat zag er ongeveer zo uit:
Quiltbee January
After that, I stitched the scraps together, more or less straight. It's supposed to look scrappy, after all.  Next I stitched the background fabric to both sides of the scraps.

Daarna heb ik de stofjes van het korte stuk aan mekaar gestikt, in een min of meer rechte lijn. Wat schots en scheef maakt het leuk, vind ik. En dan heb ik aan beide kanten de achtergrondstof bevestigd. Dan had ik dit resultaat:


Then I made the second piece, following the same procedure: first the scraps, then the background fabric.
Vervolgens was het tweede stuk aan de beurt. Weer hetzelfde procédé: eerst alle restjes aan mekaar, om vervolgens de zijkant eraan te stikken.

Finally some corners needed finishing and I sort of squared the block up. I'm quite pleased with the result, although the block is bigger than intended. The next letter really can't be bigger than 10".

Tenslotte moesten nog wat hoekjes en kantjes afgewerkt worden, en heb ik het blok wat recht gesneden. Ik ben best tevreden met het resultaat, alhoewel het wat groter uitgevallen is dan  gepland. De volgende letter mag echt niet groter dan 10 inch worden.
 If you would like to know more about how to make these blocks and word quilts, you can have a look at this book by Tonya Ricucci.

Als je graag meer wil weten over dergelijke blokken en woordquilts, dan kan je op zoek gaan naar dit boek van Tonya Ricucci.

maandag 16 juli 2012

A scrappy quilt and an abbey - Een restjesquilt en een abdij

I managed to finish my scrappy quilt last weekend: quilting, stitching the binding and handsewing it to the back of the quilt en getting rid of all the loose threads.

Afgelopen weekend ben ik er in geslaagd mijn restjesquilt helemaal af te werken: alles stikken, de bies er op plaatsen en met de hand vastzetten aan de achterkant en tenslotte alle losse draadjes wegwerken.

I convinced my hubby to take some pictures at the Parc Abbey (in between showers of rain, thanks to our glorious summer), a favorite spot for joggers and walkers in my hometown of Leuven. This beautiful abbey was founded in 1129 by Norbertine monks who received the land from Godfried I with the Beard (yes, that's his real name). The abbey was at the peak of its influence and wealth in the 17th and 18th centuries, and many buildings date from that time. A big part of the abbey is being restored at the moment.

Bovendien kon ik op de wederhelft rekenen om, tussen de regenbuien in (oh, die Belgische zomers...), enkele foto's te nemen in de abdij van Park, een favoriete wandel- en joggingplaats van veel Leuvenaars. Deze mooie abdij werd in 1129 gesticht door Norbertijnen, aan wie Godfried I met de Baard zijn jachtpark had geschonken. De abdij kende het toppunt van haar invloed en rijkdom in de 17e en 18 eeuw, en vele gebouwen dateren uit die periode. Een groot deel van de abdij wordt momenteel gerestaureerd.

Godfried with the Beard. Looks as if he hit the gym at least 3 times a week!
Godfried met de Baard. Blijkbaar een zeer regelmatige bezoeker van het fitnesscentrum!

My quilt in front of the tower of the abbey's church. Behind me are the abbey ponds, used to cultivate fish. We skate on them in winter.
 Mijn quilt met op de achtergrond de toren van de abdijkerk. Achter me zijn de vijvers van de abdij, waar vis in gekweekt werd. In de winter schaatsen we op die vijvers
The entrance road to the abbey. You have to pass several gates before being at the abbey.
De dreef naar de abdij. Pas voorbij verschillende poorten ben je bij de abdij.
 
 The stairs and the entrance to the abbot's quarters
De trappen en de toegang tot de abtsvertrekken


 These are the guests quarters
Dit zijn de gastenvertrekken
And some detailed pictures of my quilt. You can see I quilted simple straight lines through the white space, and only two diagonal lines through the blocks. For the back I used a Valori Wells fabric (Del Hi Paisly, I bought yardage almost a year ago). The binding is a black and white stripe. People familiar with quilt blogs will no doubt recognise the strong influence of Red Pepper quilts! The size of the quilt is about 150cm x 150 cm (59" x 59").

Een paar detailfoto's van de quilt. Ik heb simpele rechte lijnen gequilt in het witte gedeelte en maar 2 diagonale lijnen door de blokken. De achterkant is een stof van Valori Well ((Del Hi, ik kocht een aantal meter een jaar of zo geleden). De boord is een zwart en wit streepje. Als je bekend bent met quiltblogs herken je ongetwijfeld de sterke invloed van Red Pepper quilts! De afmetingen van de quilt: ongeveer 150cm x 150cm.


You can find more information about the Parc Abbey on this website (in Dutch). For more pictures, Google these words: "Abdij van Park Leuven".
Meer informatie over de Parkabdij vind je op deze website. Meer foto's vind je op Google met deze trefwoorden: "Abdij van Park Leuven".

donderdag 12 juli 2012

Cats and quilts - Katten en quilts

I'm a cat person. I've always had cats and it would be really difficult to live without them. At the moment, I have two of them running around the house, brother and sister, although you couldn't tell by looking at them. But there's one thing that drives me mad. Ever since there are quilts in the house, they've become the favorite sleeping place of my tomcat. And he leaves his hair all over them. Very annoying.

Ik ben een kattenmens. Ik heb altijd al katten in huis gehad en zou ze moeilijk kunnen missen. Er lopen hier momenteel twee exemplaren rond, broer en zus, al lijken ze geen haar (haha) op mekaar. Aan één ding erger ik me echter constant. Sinds er hier quilts in huis zijn, is dat de favoriete slaapplaats van de kater geworden. En dus hangen die altijd onder de haren. Bijzonder ergerlijk. 

 The lord of the manor on his throne - de heer des huizes op zijn troon

It was necessary to find a solution to this problem. Now, if you know cats, you'll also know that it was absolutely imperative to come up with a worthy alternative. If not, Mr. cat would no doubt go back to my quilts. Only the best will do for him. And the best could only be a personal cat-quilt.

Vandaar een poging om daar iets aan te doen. Uiteraard moest ik zorgen voor een waardig alternatief, want anders zou katermans er zijn neus voor ophalen. Enkel het beste is goed genoeg. En dat beste kon enkel een privé-quilt zijn.

I found a fun cat fabric online somewhere (The Neighborhood by Monica Lee for Timeless Treasures) and bought half a yard, that I cut into 2 fat quarters. For batting I used narrow leftover pieces that I stitched together to make 2 pieces approximately the size of the fat quarter. The back is a recycled men's shirt.

Ik vond een leuk kattenstofje ergens online (The Neighborhood door Monica Lee voor Timeless Treasures) en kocht een half metertje, dat ik tot 2 fat quarters verknipte. De vulling maakte ik door allemaal smalle restjes aan mekaar te stikken tot 2 lappen die groot genoeg waren voor de fat quarter. Voor de achterkant recycleerde ik het achterpand van een herenhemd.


I stitched simple straight lines through all layers, without bothering to measure the distance between the lines as I don't think the cat will really care. And after half an hour behind my sewing machine I had a cat quilt!

Ik stikte simpele rechte lijnen door alle lagen, zonder veel aandacht te besteden aan de afstand tussen de lijnen. Gelijke afstand of niet, de kat zal het niet veel kunnen schelen. Alles samen een half uurtje werk en ziehier, de kattenquilt!

Oh, and by the way: I'm making excellent progress on my scrappy quilt! I hope to finish the binding this weekend.

En ik heb de laatste dagen ook heel wat vooruitgang geboekt met de restjesquilt! Ik hoop dit weekend de boord af te kunnen werken.


Related Posts Plugin for WordPress, Blogger...